
Christmas can be a trying time for all parents. With having to juggle several tasks like buying presents, preparing a holiday feast and managing your’s as well as the kid’s busy schedule, decorating the house and wrapping presents can become difficult. Hence, it is a great idea to involve your little ones to help you with these tasks. Below, we have given 10 fun Christmas crafts to do with your kids this holiday season.
Christmas crafts ideas to make with kids
Embellished Stocking
You can make a bunch of personalized stockings for your entire family this Christmas. To make these, fold the hem of your stocking and attach ribbons, pompom-trim or decorate them with glitter as well as stickers. Once it’s fully dry, fill it with your choice of stocking stuffers.
3D Paper Ornaments
To make multi-dimensional coloured cardstock ornaments, firstly, cut five strips of paper- two of the length 1.25 inches x 10 inches, two of the length 1.25 inches x 7 inches and one of 1.25 inches x 5 inches. Then punch a hole 1/4 inch from the top and bottom of each strip. Stack the papers together with the smallest in the middle, sandwiched by the larger strips. Line up all of the strips and thread a piece of string through the holes. Repeat this step on the other end. Then fan out the strips. Your ornament is now read. You can further decorate it by adding tassels or ribbons.
Twig Ornaments
Glue different-sized twigs in the shape of stars, snowflakes and trees. Then add colourful embroidery thread for decoration.
Santa Advent Calendar
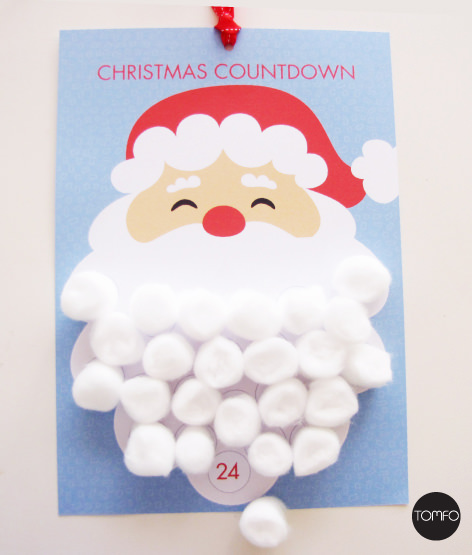
Creating this advent calendar to count down the days to Christmas is very easy. Firstly, cut out Santa’s head, beard and hat on pieces of white and red paper. Draw his eyes, nose and moustache. Then jot down 1 to 25 on his white beard. Then starting December first, have your children glue a cotton ball on the numbers till Santa’s beard is complete.
3D snowman ornament
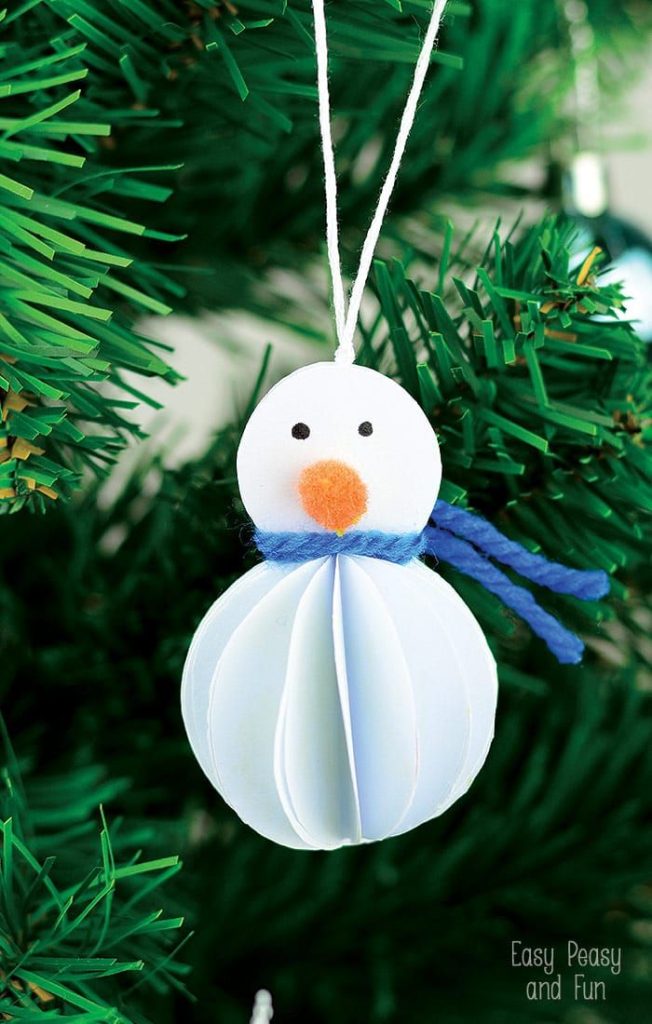
This snowman ornament will surely take your tree up a notch. You will reduce white cardstock, 2 and 3-inch circle punches, tape and white ribbon for the body. Firstly, cut six circles of each size from the white cardstock. Then fold them in half and tape them together. At the back of both pieces, add two strips of tape side-by-side down the middle. Cut a 9-inch long ribbon and stick it in the middle. Close the back of the snowman with more tape. Add a long orange triangle for the nose, and two strips of brown paper for the arms. Finally, glue the top and bottom spheres.
Santa slime
For this fun project, all you need is red glitter glue, ¼ cup water, ½ cup baking soda, 4 cups unscented shaving cream, red food colouring and 2 tbsp contact solution.
Firstly, empty the bottle of glue in a bowl and mix in water then mix in baking soda and shaving cream. Once it is combined add food colouring. You will need a lot as the shaving cream is white. Once all ingredients are thoroughly mixed, add in contact lens solution. Only add in a little at a time to prevent your slime from becoming hard. Now knead the mixture till you get the desired consistency. Finally, your slime is ready. Store it in an airtight container.
Pine cone trees
You will require pine codes, paint, paint brushes, a hot glue gun and a small wooden star. Firstly, paint your pinecone green. Ensure to paint all nooks and crevices. However, you can leave a bit of the pinecone showing to give it a more rustic look. Then using paint of other colours add tiny dots to represent the lights. There is no correct way to add these dots. Scatter them around for a fun look. Finally, glue the star to the top of the tree.
Chocolate Centerpiece
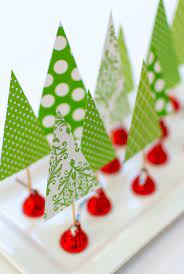
This easy DIY is great for kids of younger age. Simply cut triangles from green coloured papers to represent trees. Glue these trees to a toothpick. Let the kids poke the top of theKisses with the toothpicks and arrange them on a platter. The centrepiece is now ready. It is homemade, affordable and quite delicious.
Snowflake stamped bags
After you have baked cookies with the little ones, put them together in snowflake covered gift bags. These make for great homemade gifts to make for friends and family.
Firstly, stamp snowflakes onto the front of brown paper bags. Rubber stamps can be easily purchased from any craft store. You can also you white paint if you do not have an ink pad. Then create two small holes at the top of the bag using a hole punch. Thread some bakers twine through the holes. Now put your cookies in and tie up the bag.
Snow globe ornaments
For this fun DIY, trace the opening of a shit glass on card stock. Then cut the circle slightly larger than the circle. Add a figurine to the centre using a glue dot. Then add 1 tbsp of Epsom salt to the cup and line the rime with tacky glue. Finally, adhere the base to the rim of the glass such that the figurine is inside it. Thread a string through a button and glue it to the top of the glass. Your 3d snow globe ornament is ready.
Final thoughts On Christmas Crafts for kids
The holidays are the perfect time to spend with family. However, due to the amount of work including purchasing gifts and preparing a holiday meal, decorating your home can be quite difficult. A fun way to do both is to involve your kids in fun crafts and decorate your home with them. The above Christmas crafts can be done by kids of all ages with supplies that can be found at home or easily purchased.
Share with your friends


