
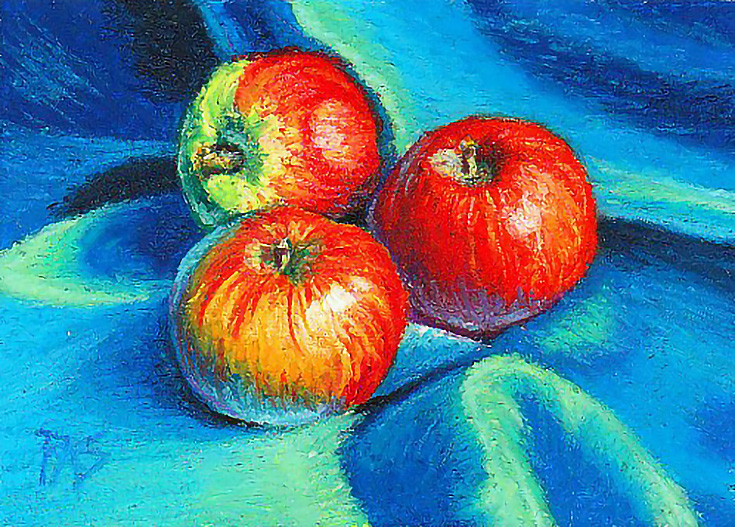
Does the scintillating texture and versatility of oil paints rivet your attention? Do you love experimenting with brilliant refulgent colours? Does the idea of using too many mediums for painting make you a reluctant artist? Well, if that’s you, you are certainly at the right place because oil pastels offer you more than you can ask for at a minimum. Follow this ultimate beginner’s guide to oil pastels to know more.
Why Oil Pastels?
The combination of wax, oil, and pigment is non-toxic and safe to use for children. Sakura in 1925 invented oil pastels and called it Cray-Pas. The rich pigment behaves a lot like oil paint and creates vibrant drawings. Follow the ultimate beginner’s guide to oil pastels and with practice and creativity unleash the artist inside you!
The versatile opulent colour sticks allow you to ditch paintbrushes, palettes, solvents, and dive right into creating art. Consequently, oil is free from chemicals and do not crumble or smudge. The fun and easy-to-use pastels are convenient for kids, beginners, professionals, and even for the aged. With the realistic intense colours spill your imagination on your canvas brazenly and let the spectacle conjure magic. But before we delve into the world of pastels let’s learn the basics.
Curious to know more about pastels? Watch How to use oil pastels for beginners in 5 minutes.
What are Oil Pastels?
The incredible creation sticks consist of pigment from the ground with a binder of non-drying oil or wax. The rich, smooth creamy texture of the drawing medium allows the artists to skillfully blend and experiment. The greasy texture stick is ideal for curating your soaring vision on paper, board, canvas, wood, glass, wall, or even a stone!
Oil pastels are user-friendly, they are easy and quick to use, and require minimal care. In order to learn pastels, all you need is pastels themselves, paper, and a used cloth to avoid making a mess.
Are you also interested in watercolour paintings? Have a look at Watercolour paintings: Mistakes to avoid when painting with watercolours.
Due to their affordability pastels are famous among students. The medium can be easily carried and can be used to create a variety of effects and techniques. Oil pastels can be easily blended, mixed, scraped off, built up, made to look wet paint, give oil finish, or simply used dry. The medium is best suited for curious and imaginative individuals who refuse to rest on their laurels.
Just bought your new set of pastels and wondering where to start from? Check out The Basic of Oil Pastels How to Use oil pastel and get started! The beginner-friendly easy tutorial will make you fall in love with the opulent colours! Therefore, pick up your pastels and start blending!
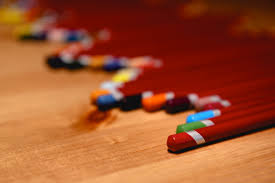
Other Types of Oil Pastels
Pastels are available in several types all with their unique characteristics and usage. Before you decide to buy the vibrant shades know what is best suited for your needs. There are essentially five types of pastels.
Soft Pastels
Traditional forms of pastels contain a high concentration of pigment and the least amount of binder. The buttery texture and fragile consistency make it perfect for producing remarkable painterly effects (blending and layering).
The fragile structure and smooth texture make it tricky to use and hence, is considered apt for professionals. Used for creating an extensive range of techniques these pastels come in all forms of shapes – long to short, fat to thin and round to square.
Renowned brands of soft pastels are:-
- Rembrandt soft pastels
- Sennelier Soft Pastels
- Blick Artists’ Soft Pastels
- Schmincke Half-Stick Extra-Soft Artist Pastel Set
- Faber-Castell Creative Studio Soft Pastels
- Loew-Cornell Soft Half Pastels.
Hard pastels
Well suited for precise or detailed work including drawing and sketching hard pastels are stable with more binder and less pigment. It provides excellent finishing touches and can be used for blending.

When used with soft pastels it produces balanced splendid art. The sharp dark lines of hard pastels are a result of the correct combination of pigment, water, and binder usage. Some renowned brands for hard pastels are:-
- Prismacolor 27051 Premier NuPastel
- Charvin Water-Soluble Semi-Hard Pastels
- Mungyo Gallery Semi-Hard Pastels
- Cretacolor Hard Pastel
- Koh-i-noor Gioconda by Officemarket
- Cretacolor Pastel Carre
- Faber-Castell Polychromos.
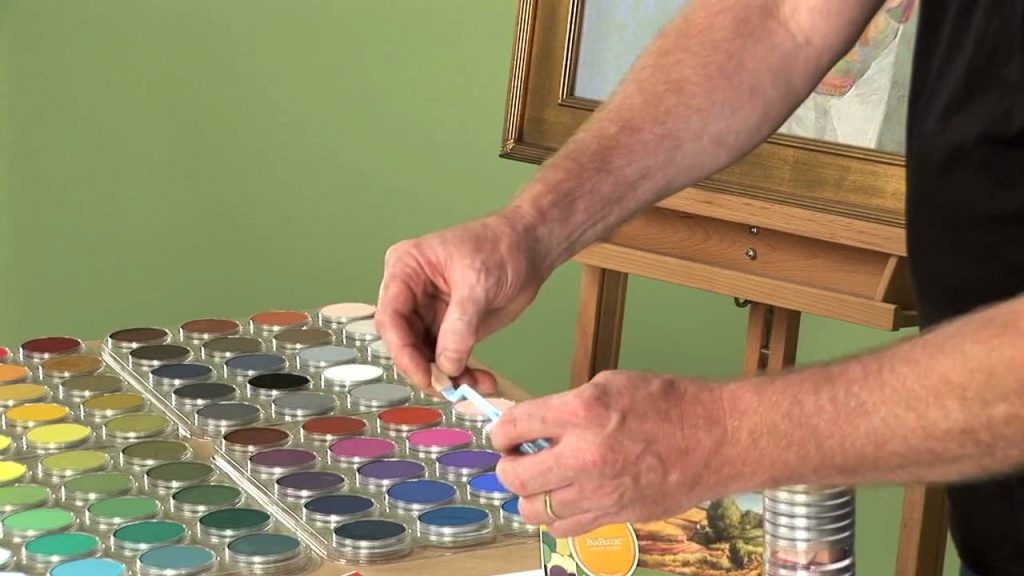
Pan Pastels
Pan pastels just as the name suggests are a form of soft pastels that are moulded into pans or jars. Therefore, allowing the highest concentration of pigment as compared to any other pastel along with safe and easy storage.
They are easy to blend and compatible with a wide range of surfaces. Usage of paintbrushes and other painting accessories is a must in pan pastels.
Pencil Pastels
We know of soft pastels and hard pastels but what if we are looking for something in between? Pencil pastels are the perfect combination and consistency of soft and hard pastels enclosed in a pencil case. The structure gives the artists controlled and detailed access.
If you are someone who is looking for the surreal experience of using pastels but at the same time want to avoid the mess, pencil pastels were made for you! Renowned brands of pencil pastels are:-
- Stabilo CarbOthello Pastel Pencils
- General’s Pastel Pencil
- Faber-Castell Pitt Pastel Pencils
- Derwent Pastel Pencils
- Koh-i-Noor Gioconda Pastel Pencils.
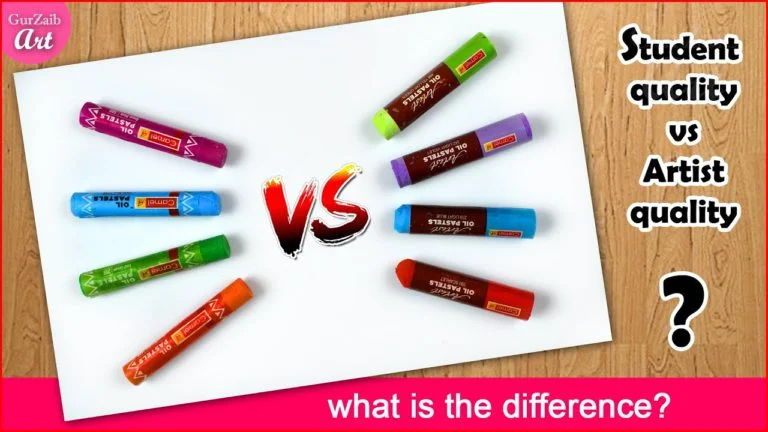
Artist’s Quality and Student’s Quality
There are mainly two grades when buying oil pastel: Artist’s Quality and Student’s quality. The major difference between the two is the ratio of pigment to binder. In the artist’s quality, there is a higher ratio of pigment to the binder and as a result, the colour is stronger and more intense. This is best suitable for professionals and also comes at a higher price.
Whereas in the student’s quality there is more binder or filler used which makes the stick harder and less vibrant. Therefore, it is apt for beginners, students, and young children stepping into the magnificent world of art and colour.
Therefore, the saturation and high pigment in the artist’s quality makes it super easy to blend which is a key feature of pastels. Consequently, layering which is also a very important feature of oil pastels is comparatively easy in artist’s quality colours because of its smoothness. In students’ quality pastels, very often colours get blended while layering. However, for beginners student’s quality set is ideal because of its affordability and easy application.
Accordingly, beginners are advised to purchase sets over single oil pastels. This is not only affordable but also exempts the users from the dilemma of choosing precise colours. Oil pastel sets have a variety of shades to offer.
Surface for Oil Pastels
Oil pastels are versatile and hence, can be used on a variety of surfaces. Although we must be aware of the nature of the oil pastels that make them greasy and super smooth. Oil pastels never really dry and therefore, there is a risk of smudging and turning our beautiful art piece into a muddy mess.
We can use oil pastels on paper, cardboard, canvas, wood, glass, and even on rocks! However, taking into account the texture of oil pastels, papers that have a bit more tooth than smoother papers is ideal.
As a beginner who requires a lot of practice and polishing you can go for papers of inferior quality. However, when working with oil pastels using textured and heavyweight paper is a smart choice. You can only avoid the smooth nature of oil pastels to not ruin your painting by getting an ideal surface.
Before, choosing the right surface for your painting you must ask yourself what kind of painting you wish to create? Do you want to add the turpentine effect to your art? Are you aiming to create the typical oil pastel painting? It all lies in your answer. When planning to work on a drawing, pastel paper is an ideal choice. However, it does not go with the mineral effect. Watercolour paper and canvas paper are your right-up ally when deciding to use mineral spirits in your artwork.
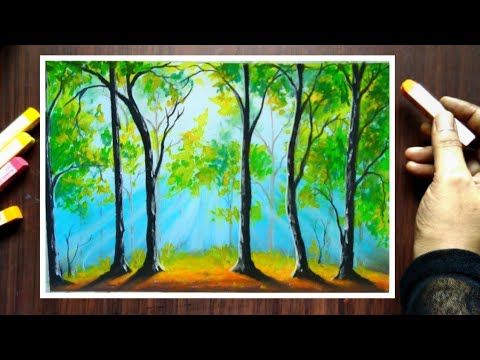
Techniques
Gather your materials – pastels of your choice, blank sheet, and personal space to work! Get ready to create your first masterpiece with the ultimate beginner’s guide to oil pastels. Remember with every skill you acquire, every technique you learn you are getting one step closer to your destination.
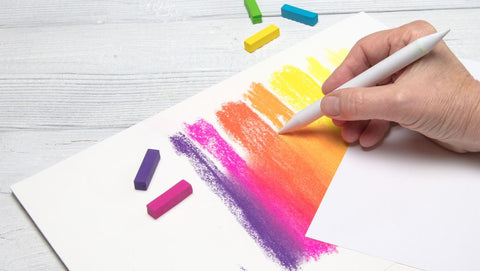
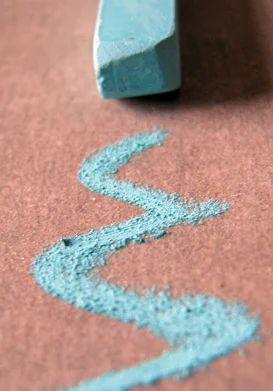
Blending
The foremost and important technique when using oil pastels is undoubtedly blending! Blending is fun and essential when it comes to oil pastels. You can use your fingers, paper towel, or even a piece of cloth to blend.
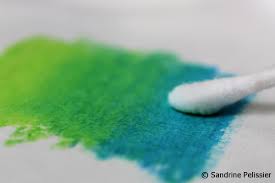
First, pick a pastel of your choice and rub it on a piece of paper. Consequently, gently rub it to create a blurry or shadowy effect. Take a note of how the colour changes or diverts. The more you blend the more the colour will change. Similarly, you can use different shades of colours and blend them. Create different effects with this technique.
Dont’s of Blending Oil Pastels
- Not applying the pastels with consistent pressure because the inconsistent pressure may leave white patches in between
- Applying the colours separately may not give the desired shades of oil pastels
- Straight away blending with fingers. It will not only make your fingers dirty but also give a smudged look to your art.
Do’s of Blending Oil Pastels
- Use consistent pressure and do not leave white paper underneath.
- Overlap the different shades of colours to ensure the smooth transition
- Use small circular motions where the shades of colours are overlapping and ensure uniform blend.
Want to know more about the blending techniques? As fun as blending can be, it can also get a bit messy and difficult if not done using the right techniques. Therefore, to make blending fun and consequently, we recommend you to watch How to blend with oil pastels 4 oil pastels blending techniques.
Feathering
Feathering, like the name, suggests it involves creating a feather-like stroke. Create a feather-like line that will add texture to your art. Do you remember as kids we used to create strokes vaguely in our rough notebooks with pencils?
Similarly, make short and upward strokes on the paper. Master this technique with practice. Choose two or more colours of your choice and start creating feather strokes. When you think you have obtained the desired amount of layering you can halt. Apply more pressure at the beginning and let it free towards the upward end.
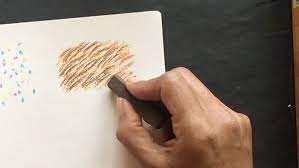
Scumbling
Very much like feathering, scumbling is a layering technique. Choose a couple of different shades according to your preference and make controlled scribble marks across the surface.
This technique is effective and enjoyable as all you have to do is to draw lines! Continue the process of overlapping until you get your desired texture or result. Do not fret over the straightness, thickness, or spacing of the lines. You can blend it later.
Masking
Masking is a technique that helps in creating distinct edges and lines within pastel artform. Pastels lack sharpness which can make them difficult to create clean and deliberate edges.
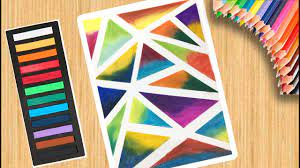
Hence to avoid this difficulty masking is used. Choose a pastel of your choice and cover the areas you do not want to colour in. Use the pastels in the spaces between the tape. When done, remove the tape and relish it in your artwork with distinctive lines and edges.
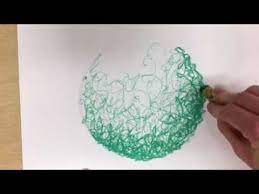
Stippling
Stippling is nothing but a technique that involves creating groups of dotted marks across the surface. This is an excellent technique and practice for beginners to enhance their skills.
Enjoy this practice and create dots all across the surface without worrying about uniformity. Create a lot of texture and dimension by following this technique in the beginner’s guide to oil pastels.
Tips and Tricks
- Let’s be honest pastels can turn into a messy business! The pliable nature of oil pastels can make it difficult to give pronounced edges to your artwork. Therefore, to avoid this mess you can feel safe to outline your paintings. Outlining your paintings will not only give them a more distinct look but also will make your work easier. Outline your painting and then fill it will colours. As kids, this method always worked, in your adulthood or learning phase, this is sure to follow.
- Do you remember your first work of art? Was it some basic intricate pattern? The winsome flower or your beloved cartoon character? It could be the universal utopian scenery with replete greenery, the bright cheerful sun between two mountains, a small river and your little house? We all had started with basic and still images. Similarly, as a beginner, you must start with basic shapes and figures or still pictures. Gradually, expand your dimensions and move on to complex figures.
Reminiscing your childhood and want to draw the same sunset scenery we used to draw as kids with oil pastels? Check out Oil pastel drawing – Sunset scenery– step by step.
- Diving into the vibrant and beautiful world of oil pastels can be wonderful but sometimes, even overwhelming. Initially, you might be tempted to use different eclectic shades. Resist the temptation and refrain from mixing too many colours altogether. As you have heard, “Too many cooks spoil the broth,” similarly, using too many colours will snatch away the beauty of your drawing. Take it slowly and decipher what looks good and what does not.
- Your pastels will vary from brand to brand. Furthermore, temperature affects the hardness and softness of the pastels. Oil pastels are firmer in cold and softer in warm temperatures. Therefore, using and trying out different brands to see your suitability and liking is a great approach.
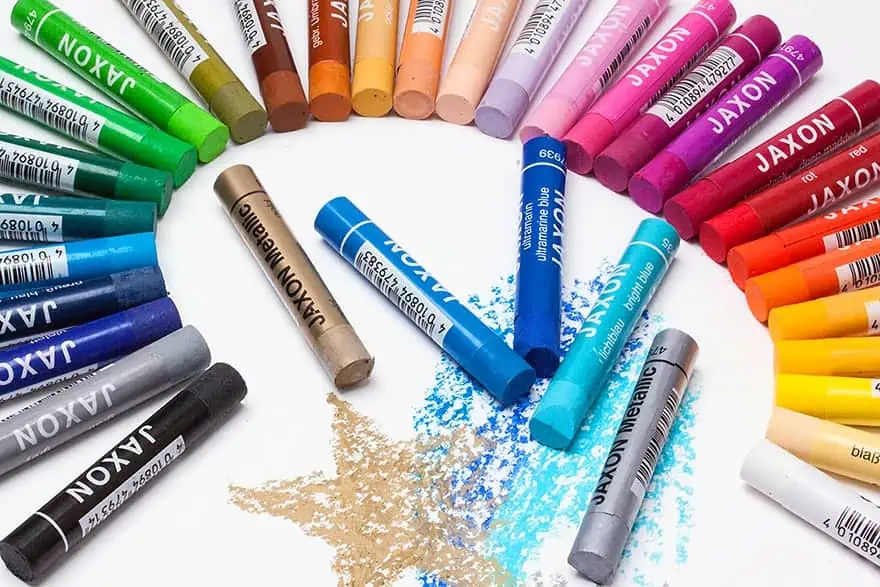
Oil Pastels Brand for Beginners
As a beginner navigating through murky waters of supplies, the evergreen bestseller oil pastels for beginners can come to the rescue.
- Sennelier Oil Pastels: The extraordinary high pigment colours are the top pick by the artists. They are creamy, vibrant and lightfast. Therefore, buy your Sennelier Oil Pastels here for a professional work of art.
- Sakura Oil Pastels: The vivid and bright Sakura Cray-Pas oil pastels are super easy to blend. The harder you push them the brighter they get. Therefore, get these bright smooth shades today and try them out on watercolour papers, dark shade papers, sandpaper see, glitter foam or any other surface.
- Caran d’Ache Neopastels: The ultra-high quality pastels are water-resistant. Consequently, the soft and velvety texture makes it beautiful to work with. Use it on wood, glass, leather, stone, acrylic and absolutely anything!
- Pentel Arts Oil Pastels: The subtle tint provided by the Pentel Arts Oil pastels makes it a great choice for kids. They are fun and easy to use which makes them an excellent pick for young creative minds.
- Crayola Oil Pastels: Pick the rich creamy Crayolapastels and layer down your imagination. Whether you want to go for comprehensive shading or detailed drawing, Crayola Oil Pastels are the pick!
- Prima Oil Pastels: Super smooth and creamy Prima Oil Pastels are great for blending and layering colours. Therefore, create your little work of art that involves a lot of layering and blending with these creamy shades.
- Faber-Castel Oil Pastels: Looking for an intense, bright and affordable range of pastels? The Faber-Castel Oil pastels with the excellent colour opacity and easy application are suitable for everyone.
- Reeves Oil Pastels: The set of 48 comprehensive range of colours is ideal for all – sketching, drawing, shading. Additionally, the smooth vivid colours can be used on a wide range of surfaces.
Final Thoughts
Painting is aesthetic poetry. Explore the arena of art by acquainting yourself with the fun vibrant colour medium. Oil pastels can be rewarding once you grasp the technique. With our ultimate beginner’s guide to oil pastels, you will know the inside out of the pastel world. Go on and throw some bright colours on a sheet and pour out your creativity. Remember, painting is all about curiosity, creativity, and the improvisation of ideas. Just let your hands move as your untethered imagination flows. Practice and do not give up for every artist was first an amateur!
Are creativity and art food for your soul? Do you love trying new forms, mediums and styles of art? Check out our blogs under Art Classes.
Frequently Asked Questions
Is oil pastels the same as crayons?
In oil pastels, the binder is non-drying oil and wax whereas crayons are made up of wax. Therefore, it is the binder that makes the difference. Blending and layering are quite easy with pastels as they are rich, smooth and creamy. Consequently, crayons leave more chunks on paper and require greater pressure while drawing.
How do you use oil pastels?
The rich unique drawing stick requires no medium to get started with. When planning to use pastels, all you need is the most suitable shades of pastels according to your need and a paper or any other surface. Start with basic shapes and simple objects, for instance, tree, apple, sun. Feel free to outline the image and start by applying light strokes. Gradually, experiment with various techniques and create your own work of art
Are pastels easy for beginners?
Pastels are best suited for beginners as they are not only simple and fun to use but also easy to master. These coloured sticks are available in various forms and shades. Besides, one can start colouring with pastels with little or no preparation. Therefore, pastels are considered one of the most preferred colouring tools for beginners.
Are oil pastels good for drawing?
Being available in various forms oil pastels are good for a wide range of art forms. The hard pastels are suitable for creating sharp, precise details whereas soft pastels are known for their easy to blend and smudge nature. Similarly, when enclosed in a pencil case pastels provide greater precision allowing control over details. Pastels’ exquisite blendability and luscious nature produce lively and beautiful artworks.
Share with your friends


