
Pencil colors are something that we have all used frequently from our school days. It is exactly like a normal pencil, just colored! Pencil colors are wax-based or oil-based. They are different from the graphite or charcoal pencils which are also used for the purposes of drawing and sketching. Some pencil colors are soluble in water which means that the top of the pencil can be dipped in water. This is done to get a smoother color on an artwork. Different sorts of pencil colors have always been available for students and for professionals.
This is so because it is considered to be the least messiest mode of art which anyone can use. Pencil colors can fit in any pencil case which makes them easy to be carried. They are extremely solid in nature, unlike paint, and spilling them will never be a problem. However, it is sad to note that professional artists, using pencil colors, are still not as respected as other artists. With new varieties of pencil colors being manufactured everyday and new methods of using them becoming popular, that day is not too far when the realities will take a U- Turn.
Which Ones To Buy?
An interesting thing about art is that it has the capabilities of relaxing one and reducing stress. The same can be said about looking at art or creating it and the pencil colors are here to help us for the same reason. Apart from professionals who use pencil colors as a career choice and students who do so in the weekly art classes, pencil colors can also be purchased and as simply used by any individual. Whether you are a teen or someone who wants a new hobby, here are some pencil colors that you will not regret buying.
Also Read: The Ultimate Beginner’s Guide to Oil Pastels
The Various Types Of Pencil Colors
As we all know, pencil colours are not only essential for students and kids but also for professional artists who make a living out of it. Therefore, it is easy to imagine why there are a number of types of pencil colours being manufactured today, in the world.
For Professional Use
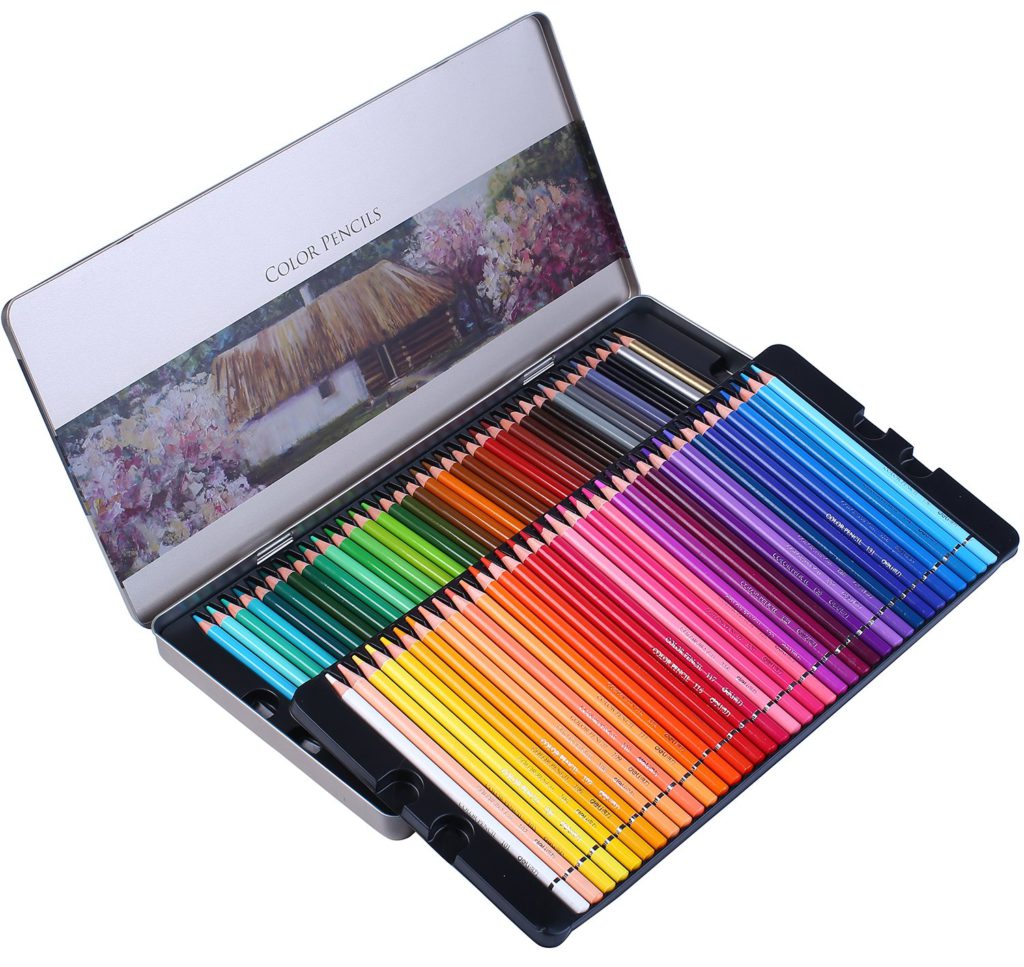
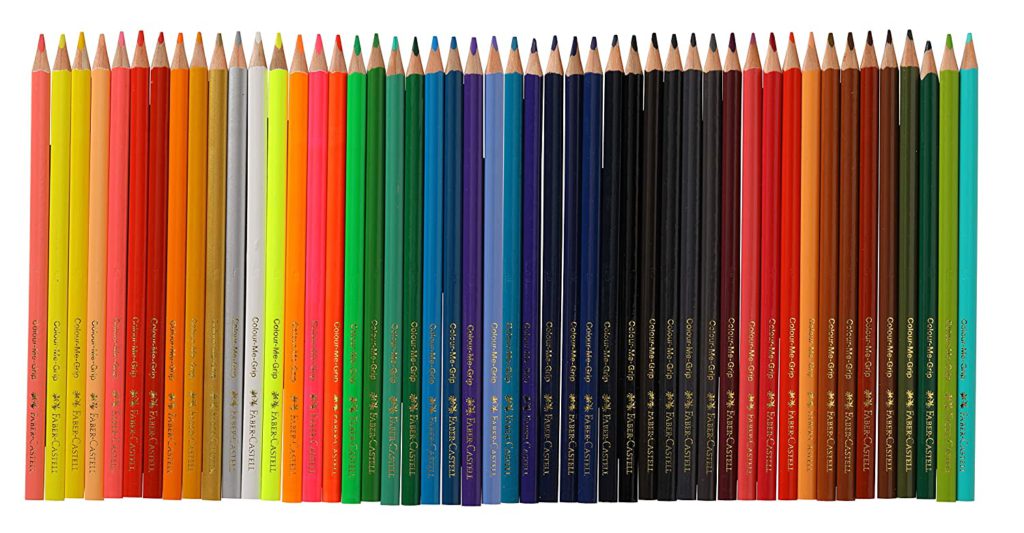
These pencils are not only available in large boxes but also singularly owing to their great quality. Whether it comes to the density of the pigment, the strength of the core or the next of the brand, these pencils vary greatly from the ones we generally find in children’s pencil boxes.
For Student Use
These pencils have an overall difference in quality from the artist grade pencils as they do not have to follow the high standard that is required for professional work. There is a difference in the durability of the core along with the concentration of the pigment and the price of the product even though it might be produced by the same company producing pencil colors for professionals. However, this also has an advantage as the student grade pencil colours are available in much smaller packs and are easier to carry. Along with that, many companies also offer erasers along that turns out to be very beneficial for students who are just starting out on their artistic journeys.
Three Sub Types
Apart from the student grade and professional grade pencils, one also has the option of water color pencils, oil based pencils and lastly, pastel pencils.
Water color pencils can be used wet and dry and are sometimes even combined to give a distinct look to the artwork. This technique involves two steps. Firstly, to color the art with the dry pencil and then to follow it by wetting the pencil to give the artwork a water color effect.
On the other hand, oil based pencil colors are different because they utilize oil as their binding agent. They are similar to the regular pencil colors but they do provide a smoother finish on paper. Pencil colors provide an oil painting like look to the finished artwork.
Similar to the water color pencils, the pastel pencils can also be used dry, wet or mixed with some other shade. These pencils are generally used in the initial sketches of the artist and are also functional in pastel paintings.
Also Read: Amazing Benefits of Colouring for Children
Techniques To Use Pencil Colors
No matter what age you are, everyone would agree that using pencil colors is a whole lot of fun. There are over a hundred shades to choose from and some are even double sided. We are here to give you a look into several easy and fun techniques. They can be used to understand how exactly we are supposed to use pencil colors. If you already know about these methods, then these techniques will definitely help you improve your skill set. Knowing these techniques are very important as that is what will give the desired look to the artwork. Once you have mastered these methods, you can combine one or more or even layer a few colors over each other. This will definitely give the art work a better look.
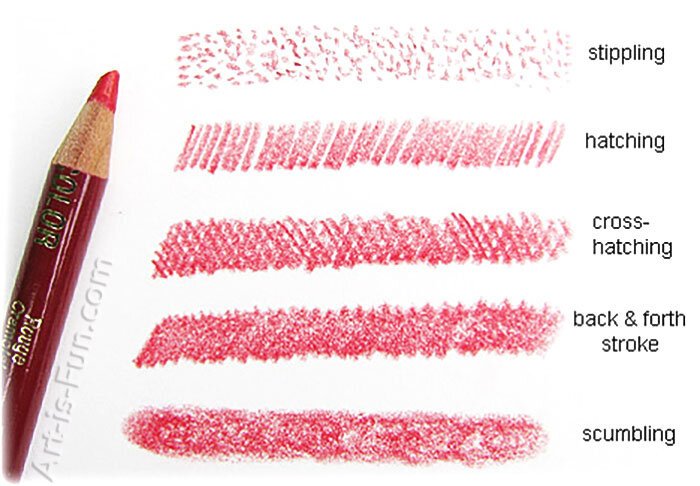
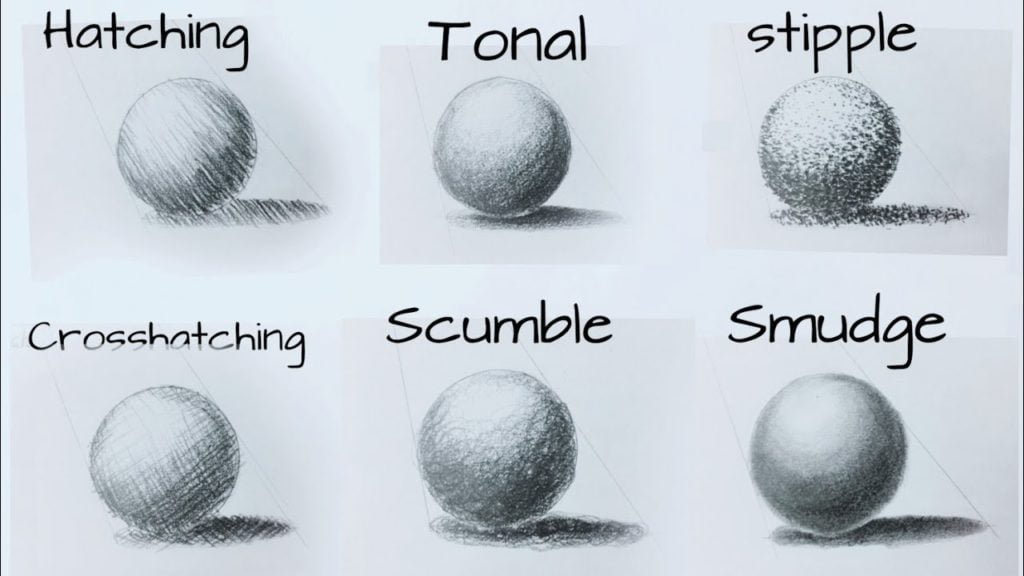
Stippling
This method is largely used to give a distinct texture to the art work. It is done by drawing a series of dots on the drawing. They could be knit close to each other or far apart in accordance with the purpose of the drawing that you are coloring.
Hatching
This technique is a very commonly used method. It involves drawing a row of individual slanting lines to fill up the coloring space. Once again, the distance between these lines can be chosen by the artist themselves. However, there are two things to remember while doing hatching. Firstly, these lines must not be connected to one and another. Secondly, all these lines must be slanting in the same direction.
Also Read: Calligraphy for Kids – Know These Awesome Advantages of Learning Calligraphy
Cross Hatching
For the purposes of texture and even for shading, cross hatching is used. The process is very simple as the first step in hatching is drawing slanting lines one after the other. The second step requires the artist to draw a similar set of slanting lines. They are not connected to each other, but in the opposite direction.
Back and Forth Stroke
This is the easiest way to utilize pencil colors. Perhaps, without realizing, we have been using this method from our younger days. This method is exactly resonates with the saying, “what is in the name!”. The pencil color should be used on the paper in a backward and forward motion. This is done to fill up the space within the drawing. This method is very effective and it helps the artist in finishing their coloring much faster.
Scumbling
This is also one of those methods, just like the back and forth stroke technique, that we all must have used in our young days. The technique involves making circular patterns within the drawing at random so that the drawing can be filled up. There are a few advantages of this method. Scumbling helps the artist finish the coloring quite fast. Some areas which might be difficult to color, such as curves or rounded portions, become easy with this method.
Shading
To add a more professional and artist-like look to your art work use this method. It will totally uplift your art piece and give it the layers it needs. A tip from us is that while using shading do not use the black pencil color. For instance, while shading a tree instead of using the black pencil colour for the purpose, using a darker shade of green will give your drawing a more natural look. Black, itself would be a very strong color and so we recommend you to use a darker share of the color that you are utilizing in your art work.
Also Read: Arabic Calligraphy for Beginners: The World of Arabic Calligraphy
Highlighting
This technique is definitely important if you want to make the art work look more realistic. To portray shiny objects or any feature that might be brighter because of the angle and the effect of light, you must highlight! This highlighting can be done using the white color pencil and we advise that you do it before you begin your coloring. This is to avoid coloring the entire space with a dark hue. Giving your art work highlights provides it an edge which may make your art work pop and will take you out of the amateur class.
Burnishing
This is the technique of immersing the paper so deeply in the rich hues so that it can give a smoother and gentler finish to your art work. It is generally done with a freshly sharpened pencil color so that the original color of the paper is not visible anymore. This is also done with a certain degree of pressure or strain applied by the artist on the paper. Using shading with this method helps take the burnishing to a different level and to create a harmony between the different layers of hues that are used in the art work.
Using External Substances
Sometimes, for a certain effect just using the pencil colors might not completely satisfy one. In those cases, one can pour a tiny amount of baby oil or rubbing alcohol on to a cotton ball. They can also use a Q-tip to create a new texture in their art work. Using these household items can easily give your art piece and unique look. In addition to that, it is also super easy and fun! This will smear the pencil colors which have been applied to the drawing and will blend them in a way which is different from the blending done by using pencil colors. We suggest that you try out this technique as soon as possible! Not only will it turn your creation into a professional piece of art but it will also allow you to enjoy your activity.
Apply Heat
This is a very special method which gives the drawing a painting-like or crayon-like look. In this method, the tip of the color pencil is heated for a few seconds and then put to paper. The warmth weakens the binder and so the color that is smeared on the paper is much thicker and closely knit than the color would be if the pencil was not heated. This method can also be used if you want to paint but do not have the supplies so it is a tip to keep in mind forever!
WHAT PAPER TO USE?
In the world of art there are so many different kinds of papers as well as textures available that it is easy for anyone to get confused about what the best option for them is. That is why we dedicate this section to those who are not sure about the kind of paper that will suit their needs. We would recommend, using a slightly grainy paper as that makes it easier to color when using pencil colors. It also helps in layering and shading. Whereas, while a plain sheet might feel smooth and shiny, it does not assist in any layering.
A rough sheet might not be able to catch the color in the way that the artist would want it. So, it is necessary to analyze all the options before coming to a definite decision. A few that we can assure you about are Bristol paper, Stonehenge paper and illustration boards. However, each Of these can be used for different styles of pencil coloring. Hence, one must first consider their requirement and then purchase the paper. Now, it seems like using pencil colors is not all that tough!

Here is your guide to making the best pencil colored drawings! There is a larger demand for pencil color artists. Hence, every piece is considered to be unique as the coloring industry is growing. Don’t worry anymore about what finish you will get on paper. With our guide, you are sure to use your pencil colors in the best way possible!
Share with your friends


