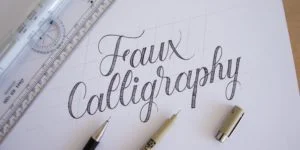
Calligraphy is an ancient art form. The first calligraphy pen was a bamboo reed pen, invented as carving text on stone was a tedious process. Additionally, stone tablets were heavy and difficult to transport. Therefore, people began using a bamboo reed and pigment to leave marks on the surface.
In this article, we will look at the history of bamboo reed pens and see how to make one at home.
History of a bamboo reed pen
A reed pen is made from a single reed that is sharpened, shaped into a square and split at the point. Reed pens were used for Cuneiform writing in 3000 BC, in ancient Sumeria. The square-shaped pens left indentations on clay and were used to record transactions to keep the economy running smoothly. Furthermore, scribes from Ancient Egypt were the first to use bamboo reed pens in 400 BC. They would dip the pen in ink and write on papyrus.
Unlike quills, reed pens are stiffer and lose their sharp point quickly. Therefore, they were eventually replaced with quills.
Materials required to make a bamboo reed pen
1. Reeds
Thin reeds can be found along coastlines. Additionally, you can find them growing at the edge of man-made reservoirs or lakes. The largest and strongest reeds are present on the edge of the reed beds. You can make around 30 pens with ten reeds.
Try to colled reeds during the winter as they are not green and in rapid growth. Also, remember to ick dried stems that are brown or ochre in colour.
2. A craft knife
3. Sandpaper
How to make a bamboo reed pen?
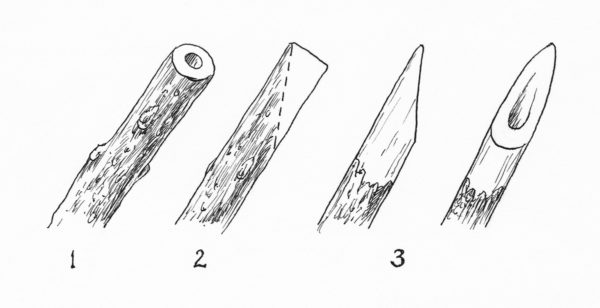
1. Before you make the reed pens, dry them in a warm place. Then lay them flat and peel the outer layer. The reeds are now ready to be cut.
2. Using a craft knife, score the reed at a natural joint. Snap the reed at this make. In addition, ensure that you don’t crush the reed tube.
3. Snap the reeds such that their length is as long as a pen.
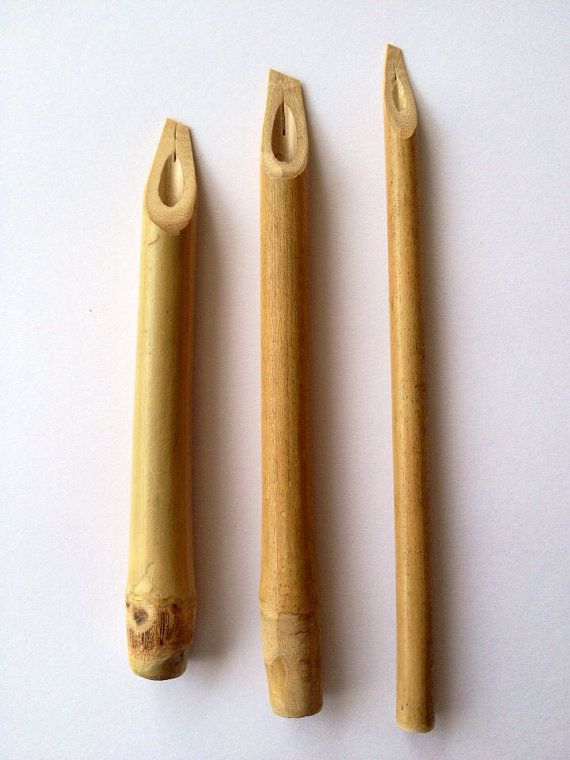
4. Again, using the craft knife, cut the end of the reed into a point. If you do not want a fine point, cut straight across the end of the nib and create a square edge.
5. Sand the cut edges to make them smooth.
6. Cut an incision in the centre of the nib that is a quarter of an inch in length.
7. Finally, your reed pen is ready. Hold your pen like a brush, dip it into the ink and start drawing.
How to do calligraphy with a bamboo reed pen?
Firstly, you would need the right ink and paper. Experiment with what you have at home to determine what works best. You can try fountain pen ink, Indian ink as well as acrylic paints. You can also use non-waterproof Chinese ink. This ink is more forgiving as you can remove some marks with water
You would require a medium weight thick paper. Thinner paper like an A4 sheet may tear due to the ink.
Basic techniques and strokes to use when writing
Begin by creating guidelines on the paper. These guidelines will help you write straight as well as at the right angle.
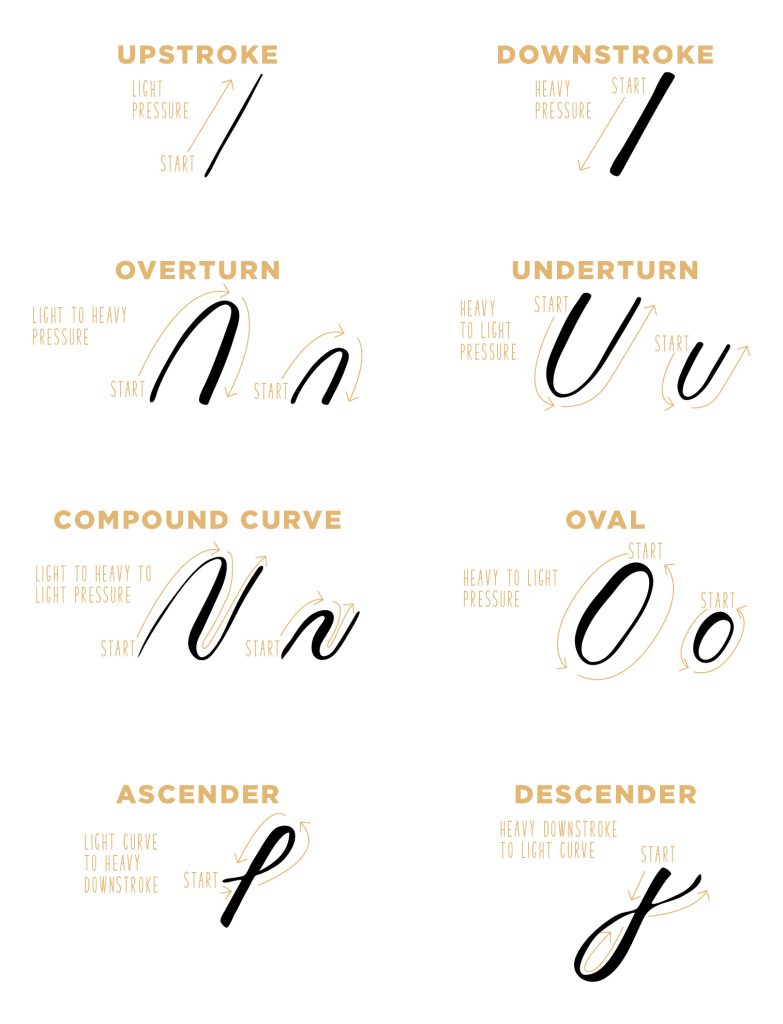
1. Upward stroke or upstroke
For this, start at the bottom and extend the line upwards with a slight curve at the end. Put light pressure as you draw the line.
2. Downward stroke or downstroke
With the downstroke, draw a line in the opposite direction to the upstroke. Start at the top and extend the line downwards. Begin with medium pressure and gradually increase it as you go down. This forms the signature thick line in calligraphy. Ensure you ease off the pressure as you approach the bottom.
3. Overturn stroke
This is a combination of an up and downward stroke. For this, start at the bottom applying light pressure, then curve over and create a thick downward stroke. Make sure that both your lines are parallel.
4. Underturn stroke
This stroke is the opposite of an overturn stroke. Firstly, start at the top and apply pressure to make a downstroke. The curve over and create a light pressure upstroke. Again, ensure that the two lines are parallel.
You can also combine the overturn and under turn stroke to create a sort of wavy pattern. Firstly, begin with light pressure and draw an upstroke. Then curve it into a downstroke. Afterwards, curve the line to create an upstroke that finally curves into a downward stroke.
5. Oval
This stroke is tricky and requires practice. Start on the side. Then with light pressure, create an upstroke. Transition at the top into a heavy pressure downward stroke. Finally, transition again into an upstroke at the bottom.
6. Ascending loop
With this stroke, start in the middle and create an upstroke. Then, curve at the top, add pressure and come back down. Ensure that everything is at the same angle.
7. Descending loop
For this stroke, you will start by creating a heavy downward stroke. Then curve and come up with a light upstroke. Remember to draw everything at the same angle and with steady pressure.
8. Entrance stroke
The entrance stroke is a thin upstroke that enters into the letter. To create this stroke, begin at the guideline and draw a thin, light pressure upstroke with your pen. Stop when you reach the top and continue the line into the alphabet you want to draw.
Final thoughts on a bamboo reed pen
Although bamboo reed pens were the first pen to be created, it is still fun to use to this date. Making reed pens can be a fun craft for your kids. Encourage them to write a message for their loved ones or draw them a picture. However, this activity requires parental supervision so that the kids do not cut themselves.
Podium School offers online classes for kids interested in calligraphy. Learn the basic techniques and use them to create stunning works with your reed pen. Click here to find out more.
Share with your friends

